Pipe DIY: A Guide to Pipe Mud
Posted by Greg Rosenberg on 25th Jun 2024
One of the hobbyist side of pipe smoking’s greatest charms is the wealth of DIY fixes and techniques that memetically spread from clever artisans to armchair tinkerers like myself who get a kick out of the exploration of it all. Pipe mud is one of these wonder solutions for the accessible and simple pipe project.
Pipe mud, a mixture of cigar ash and water which forms a workable, hard-curing putty, can be used to add material to the chamber of a tobacco pipe. In pipe restoration, it might be used to strengthen vulnerable areas that are showing signs of burnout or have been thinned from over-reaming, or to correct gurgle caused by space at the bottom of the bowl. But it also has a unique role in corn cob pipecraft.
This piece will detail using pipe mud to fill the bottom of corn cob pipe, but the method of making and applying relates to briar pipes as well (but not meerschaum). That said, I don't recommend trying to apply pipe mud to any particularly valuable pipe—price or sentimental-wise—at least not without experience.
Why is pipe mud used in a corn cob pipe?
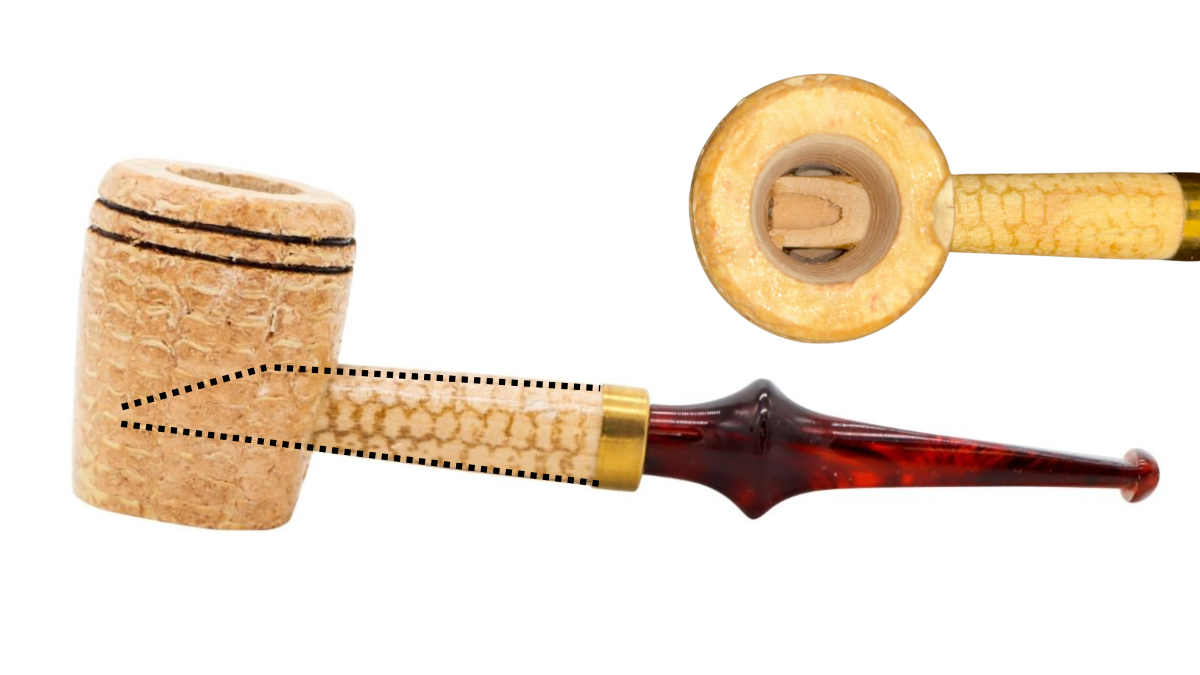
In most pipes (not cobs), the shank is shaped from the same material as the bowl, with the draft hole situated at the bottom of the chamber, at the heel. Corn cob pipes most often have a shank made from wood that protrudes into the chamber, with the exception of reed stem cobs.
This leaves open space to the sides of the shank and, depending on the model, a gap between the shank and the floor of the chamber. Some cob smokers prefer to fill these areas with pipe mud.
Forget what Ma' said about tracking in mud for a moment as we look at why pipe mud is part of corn cob pipe care for many.
- Corn cob pipes sometimes burn out from the bottom. The added material can protect against this.
- Filling in the crevices around and beneath the internal shank creates a chamber more akin to traditional pipe layout, which many prefer for the smoking mechanics.
- Dottle can easily get wedged in these crevices, which can be somewhat tedious to clean.
To be clear, the point of this piece isn't to advocate for pipe mud as some sort of necessity for any new corn cob pipe. I personally don't do it with all of mine. The intention is to give the why and how for anyone curious to try it.
Using pipe mud is the preferred method with a new cob for some, others have never done it and have no issue or desire to adopt it.
Others may or may not use pipe mud depending on the circumstance (the approach I take). Maybe it’s not an automatic procedure for a new cob, but is used at the early signs of burnout. Or one might opt to only fill those pipes with significant gaps. Some models don’t have a large gap beneath the shank and bottom of the chamber. These pipes will generally develop a more even heel through being smoked and building carbon.
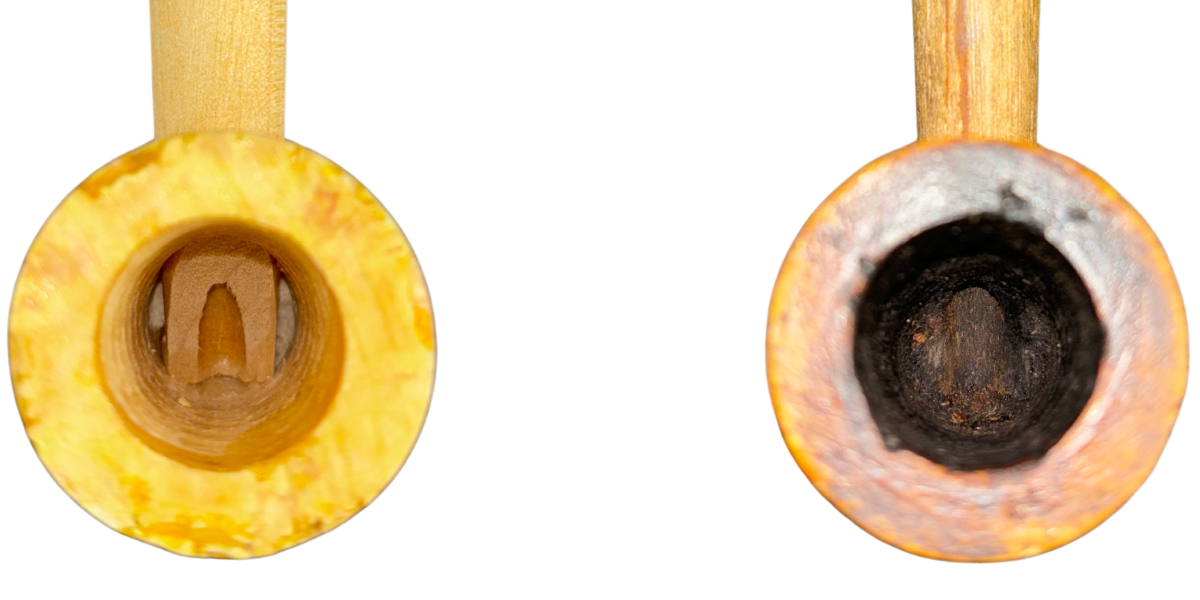
Above we have two Missouri Meerschaum Legends, one unsmoked, the other a pipe I've enjoyed for several years now. As you can tell, the draft hole on my smoked pipe has a nice transition into the heel, this is due to carbon filling what crevices were there. Basically, this internal shank sits low in the chamber, so the gaps aren't as dramatic as other models.
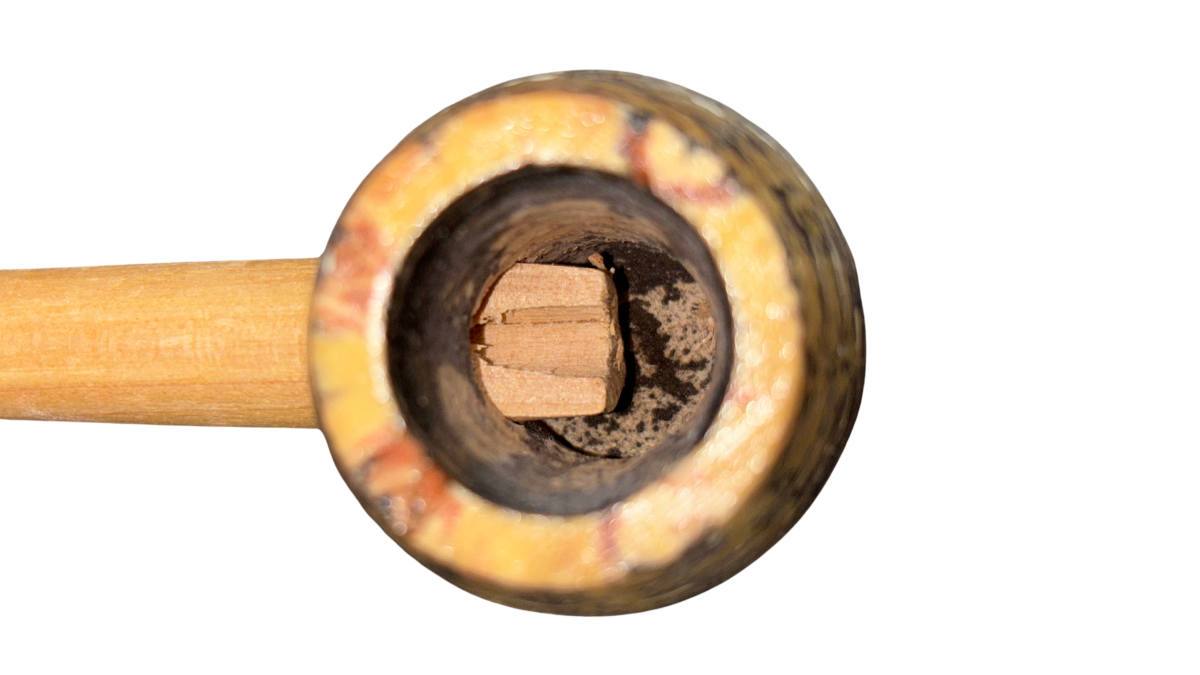
On the other hand, here is an unsmoked Missouri Meerschaum Little Devil Cutty, one of my favorite corn cob pipe models. It’s hard to see the depth very well in the photo, but notice the shadow of the shank at the bottom of the bowl. The straight angle of the stem creates more of a gap, and in my experience with the Devil Cutty’s I’ve smoked, that gap doesn’t carbonize, or at least will take a long time to fill out. So I’m going to go about applying pipe mud to this one.
How to make and apply pipe mud
What you'll need
- Cigar ash
- Container for mixing (rec: 4 oz mason jar)
- Pipe tool or another tool to act as a pestle
- Water
- Pipet (most controlled way to easily add water, but can get by without)
- Drill bit (sizes differs depending on model. For Devil Cutty it's 11/64, but check find the perfect fit for in a set for the pipe you're working with)
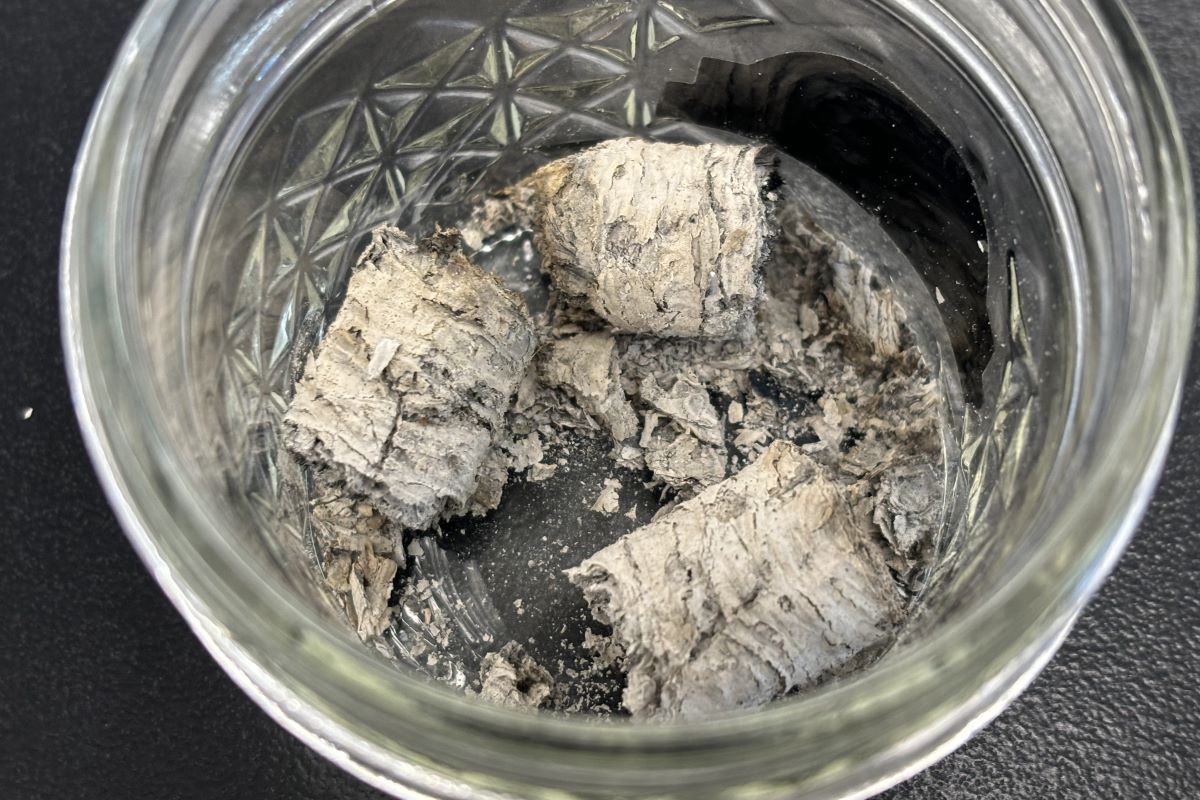
Collect cigar ash
This part is pretty straight forward. I'll ash a cigar in a clean, 4 oz mason jar. Glass is ideal for when you add water as the mixture won't stick to it, and these jars give enough space to easily mix but are shallow enough that a small tool can get the job done.
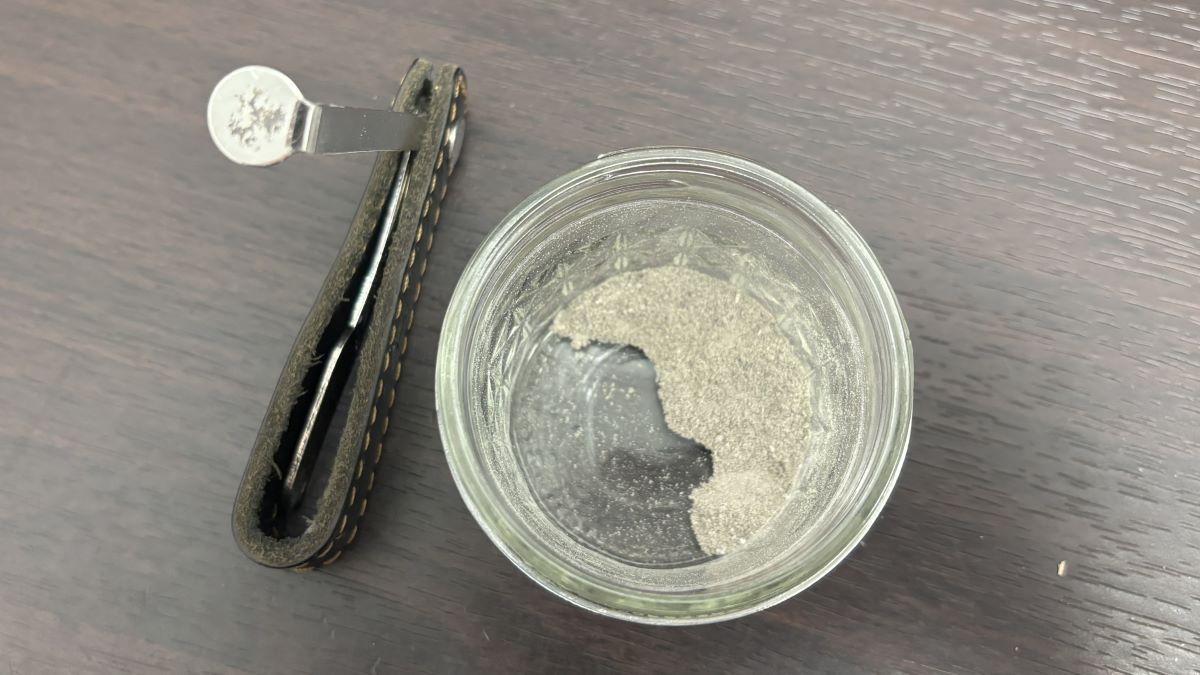
Crush cigar ash into a powder
Next, I break the ash down to powder. If you have a pestle and mortar, that's fine, but can get away with many household or pipe tools. I used the tamper on my Cobblestone Pipe Stand/3-in-1 Tool, which worked just fine.
As is probably clear from the above picture, one cigar doesn't produce as much ash as it seems before breaking down to a powder, so you may need a bit more depending on the job. The cigar I smoked was a 5 3/4 X 44 Corona; not the biggest cigar, but no cigarillo either.
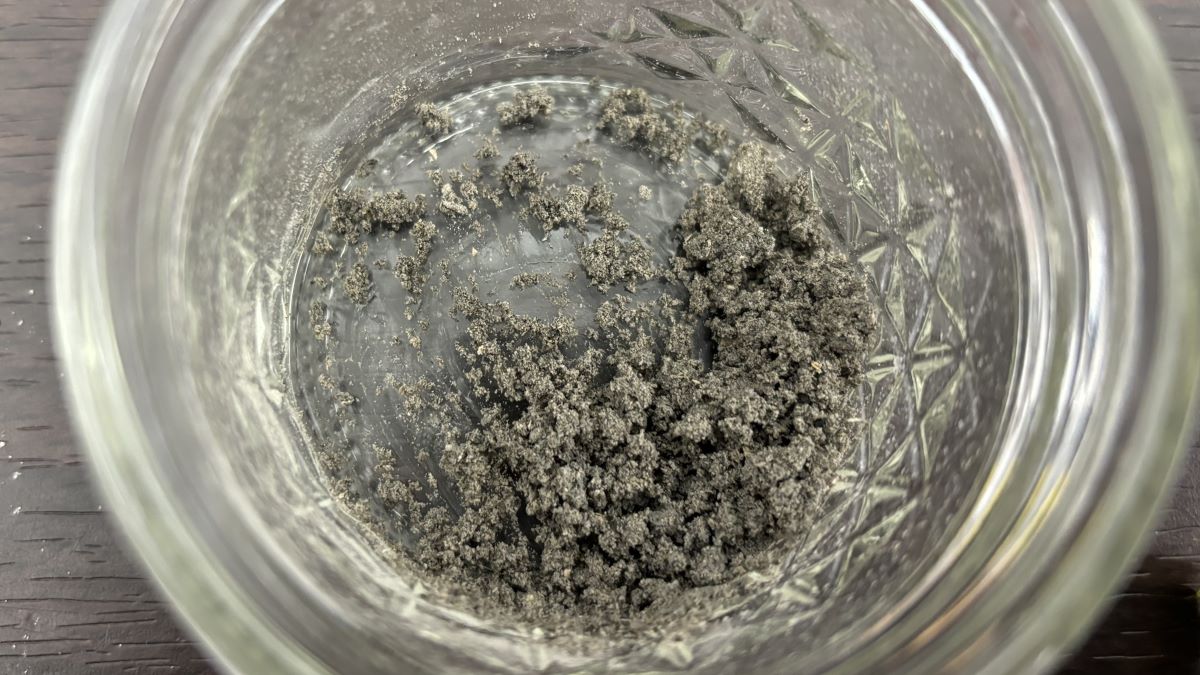
Add a little bit of water and stir
Mix in just a few drops at a time until you have a consistency that starts to clump and packs when you compress it.
I advise having a good deal of ash and not using it all at once if you haven’t done this before. Ultimately, I think the best way to really know what consistency you’re looking for is good ol' trial and error. Without the right consistency, it can be difficult to manipulate the mud in the bowl without it sticking to your instrument, so this will give you a chance to touch things up if need be without waiting until your next cigar.
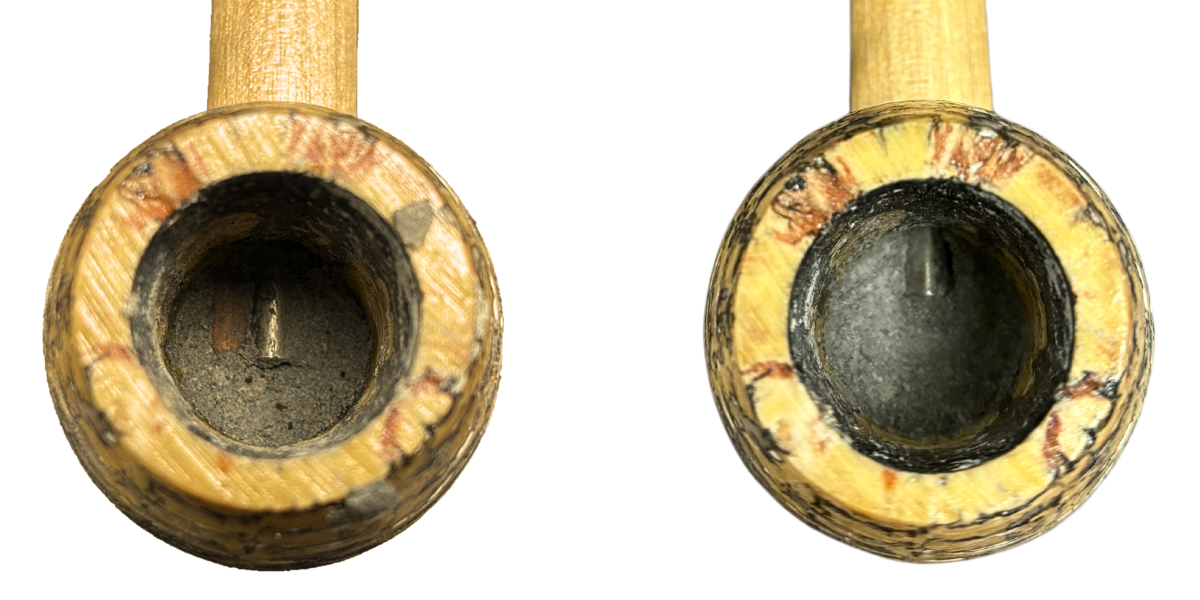
Start placing into chamber and pack it
I find it’s easiest to pack once there’s a good amount in there. Instead of, say, packing in one area, then another, I’ll just use the shovel on a small pipe tool to scoop and drop the clumps in like a gravity pack. Then once there’s a good amount I’ll start tamping, making an effort to evenly distribute. It can be finicky trying to manipulate the pipe mud with such little space.
Once I've done that, I'll insert the round end of my drill bit through the shank. This will create the draft hole. I'll then manipulate and pack whatever mud was loosened from inserting the drill bit.
Notice on the left picture, the wood is exposed to the left side of the shank. I included this to show that my first application wasn't enough and I had to go back and add more, as the right picture shows.
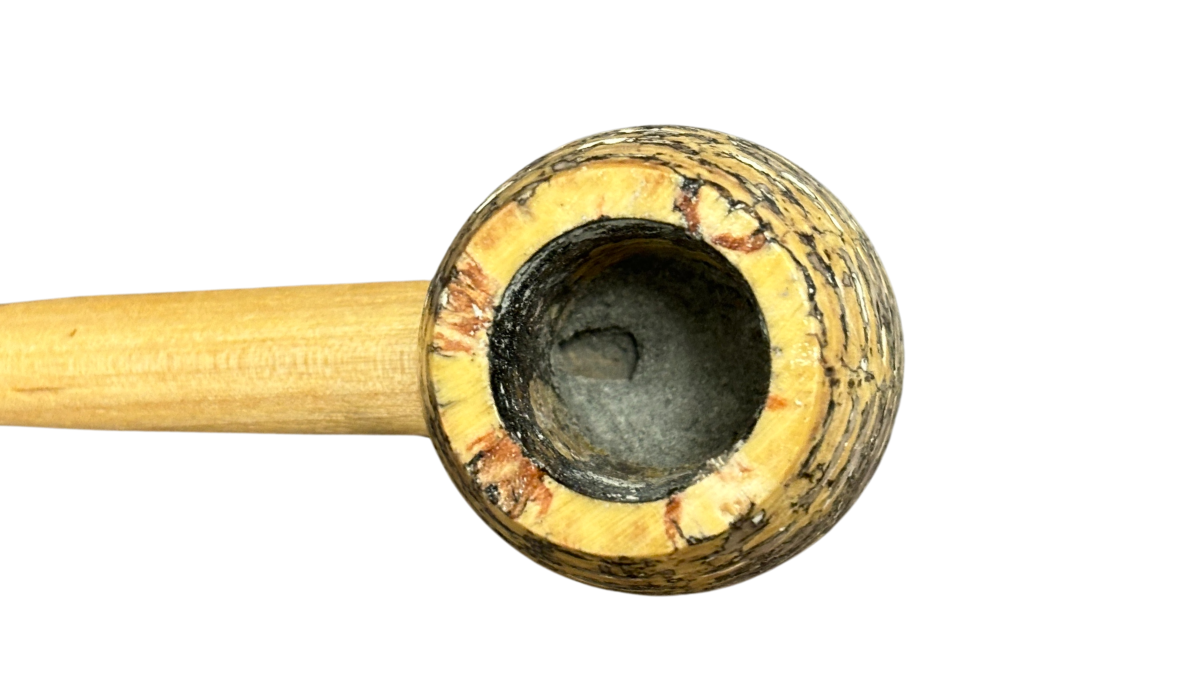
Wait a few days, ash should be almost white
Keep the drill bit inserted while your pipe mud cures.
For my first few smokes, I’ll use a blend that burns relatively quick and dry and only pack the bottom third or so of the pipe, that way I’m letting some carbonization occur before introducing much moisture.
I'll usually opt for a quality RYO blend for this job, usually something from Daughter's & Ryan (just my preference). These blends are good for a quick, even and dry smoke, with mellow flavor.
I find the ash affects the taste a bit in the first few smokes—not so offensive, but not ideal either.
I imagine many who have used pipe mud came to it similar to myself—eager to engage with all aspects of the hobby with no real expectation that it was or wasn't going to be a routine practice. It was more about entertaining my curiosity than a fix to any persistent issue, but I did find a preference for it in some situations. So, while reiterating I don't think applying pipe mud is a pipe must, I would recommend a pipe smoker with that bent toward curiosity try it on a cob in the lower price tier just to see if it's for them.

